What is an Autonomous Data Warehouse?
Oracle Autonomous Data Warehouse provides an easy-to-use, fully autonomous database that scales elastically, delivers fast query performance and requires no database administration.
Oracle Autonomous Data Warehouse is built around the market leading Oracle database and comes with fully automated data warehouse specific features that deliver outstanding query performance. This environment is delivered as a fully managed cloud service running on optimised high-end Oracle hardware systems. You don’t need to spend time thinking about how you should store your data, when or how to back it up or how to tune your queries. Oracle take care of everything for us.
Easy
Fully-managed cloud service that makes it very simple to provision a data warehouse, quickly and easily load data and query that data using built-in web-based tools such as notebooks.
Oracle’s unique autonomous database framework ensures high availability and automatic security–without requiring any additional tasks.
Fast
Delivers high performance data warehousing straight out-of-the-box with unparalleled scalability and reliability. Built on key Oracle Database capabilities: parallelism, columnar processing and compression. All aspects of performance tuning are automatically managed so the service requires no database tuning.
Elastic
Scale as needed-create and expand your data warehouse’s compute and storage capacity on demand and independently of each other with no downtime. Pay only for the resources you consume.
Complete
Integrates directly with the full spectrum of business analytics, data integration and IoT services within Oracle's comprehensive range of integrated cloud solutions.
How to Get Your Free Cloud Trial Account
If you already have an Oracle Cloud account then you can skip this section. If you don't have an Oracle Cloud account then you can quickly and easily sign up for a free trial account that provides:
- $300 of free credits good for up to 3500 hours of Oracle Cloud usage
- Credits can be used on all eligible Cloud Platform and Infrastructure services for the next 30 days
- Your credit card will only be used for verification purposes and will not be charged unless you 'Upgrade to Paid' in My Services
- Click on the link below to go to the trial sign-up page which will allow you to request your free cloud account.
https://cloud.oracle.com/tryit
When you signup to the Cloud Console, you will have the option of choosing the REGION for your new data warehouse instance.
To ensure you get the very best experience possible during this workshop we recommend that when creating instances of Autonomous Data Warehouse in North America Data Region, please choose data centre in Phoenix. When creating instances of Autonomous Data Warehouse in EMEA and APAC, please choose data centre in Frankfurt.
Pre-requisites to getting start with
1. SQL Developer
If you already have SQL Developer installed on your computer then please check the version. The minimum version that is required to connect to an Oracle Autonomous Data Warehouse Cloud is SQL Developer 17.4.
2. Data Visualization Desktop
If you already have Data Visualisation Desktop installed on your computer then please check the version. The minimum version that is required to connect to an Oracle Autonomous Data Warehouse Cloud is 12c 12.2.5.0.0.
Part 1. Provisioning an ADW Instance
In this section you will be provisioning an ADW instance using the cloud console.
STEP 1: Sign in to Oracle Cloud
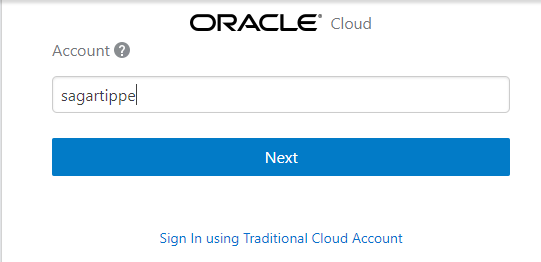
- Go to cloud.oracle.com, click Sign In to sign in with your Oracle Cloud account.
- Enter your Cloud Account Name and click Next.
- Enter your Oracle Cloud password, and click Sign In.
STEP 2: Oracle Cloud Infrastructure (OCI) : Create a Compartment
This article shows how to create a compartment, a container for a group of related resources, under Oracle Cloud Infrastructure (OCI).
Considerations:
Some things to consider before you create your first compartment.
- A compartment is a container for grouping together related resources.
- You can alter the compartment description and tags at any point, but the compartment name is fixed, so pick a name wisely. If you change your mind, the only option is to delete it, and you will see below why that may not be possible.
- Resources like virtual cloud networks, compute instances and databases are created in a compartment. Once created, they can't be moved to a new compartment.
Create a Compartment
- Use the top-left menu to select the "Identity > Compartments" option.
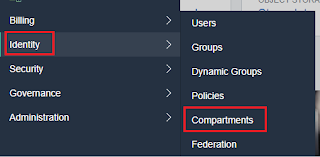
- Click the "Create Compartment" button.
- Enter the compartment name and description, the click the "Create Compartment" button.
- The new compartment is now listed on the compartments dashboard.
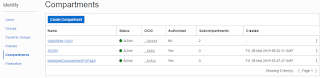
- You can now create resources in the compartment.
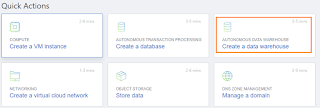
STEP 2: Create an ADW Instance
- Once you are logged in, you are taken to the cloud services dashboard where you can see all the services available to you such as this.
- Select the any non-root compartment, or another compartment of your choice where you will create your new ADW instance.
Note - Avoid the use of the Root & ManagedCompartmentforPaaS compartment as this is an Oracle default used for Oracle Platform Services.
- Specify a memorable display name for the instance. Also specify your database's name, for this lab use ADWH.
- Next, select the number of CPUs and storage size. Here, we use 2 CPUs and 1 TB of storage.
- Then, specify an ADMIN password for the instance, and a confirmation of it. Make a note of this password.
- Click "Create Autonomous Database"
- Your instance will begin provisioning. Once the state goes from Provisioning to Available, click on your display name to see its details.
- You now have created your first Autonomous Data Warehouse instance. Have a look at your instance's details here including its name, database version, CPU count and storage size. This might take 3-4 minutes to create the instance for you.
Part 2. Connecting to ADW
As ADW only accepts secure connections to the database, you need to download a wallet file containing your credentials first. The wallet can be downloaded either from the instance's details page, or from the ADW service console.
STEP 1: Downloading the Connection Wallet
In your database's instance details page, click DB Connection.
STEP 2: Download the Connection Wallet
- Under Download a Connection Wallet, click Download.
- Specify a password of your choice for the wallet. You will need this password when connecting to the database via SQL Developer later, and is also used as the JKS keystore password for JDBC applications that use JKS for security. Click Download to download the wallet file to your client machine.
Note: If you are prevented from downloading your Connection Wallet, it may be due to your browser's pop-blocker. Please disable it or create an exception for Oracle Cloud domains.
Connecting to the database using SQL Developer
- Start SQL Developer and create a connection for your database using the default administrator account 'ADMIN' by following these steps.
- Click the New Connection icon in the Connections toolbox on the top left of the SQL Developer homepage.
- Fill in the connection details as below:
Connection Name: ADMIN_HIGH
Username: ADMIN
Password: The password you specified during provisioning your instance
Connection Type: Cloud Wallet
Configuration File: Enter the full path for the wallet file you downloaded before, or click the Browse button to point to the location of the file.
Service: There are 3 pre-configured database services for each database. Pick <databasename>_high for this lab.
For example, if you the database you created was named ADWH, select ADWH_high as the service.
Note : SQL Developer versions prior to 18.3 ask for a Keystore Password. Here, you would enter the password you specified when downloading the wallet from ADW.
- Test your connection by clicking the Test button, if it succeeds save your connection information by clicking Save, then connect to your database by clicking the Connect button. An entry for the new connection appears under Connections.
- If you are behind a VPN or Firewall and this Test fails, make sure you have SQL Developer 18.3 or higher. This version and above will allow you to select the "Use HTTP Proxy Host" option for a Cloud Wallet type connection. While creating your new ADW connection here, provide your proxy's Host and Port. If you are unsure where to find this, you may look at your computer's connection settings or contact your Network Administrator.
You're in.. :) Happy stay.!!